


In the wild and woolly world of trekking and hiking, I've earned myself quite the ignoble title of "Blister Queen." When fellow trekkers hear my trail name, I either get a good laugh or sympathetic nods of understanding.
I've gone through every shoe, sock, and slippery substance imaginable – from petroleum jelly to dishwashing soap – all in a desperate attempt to outsmart those pesky blisters. I even went full-on sheep mode, collecting wool on fences in New Zealand to stuff into my shoes. But no matter how hard I try, it's like my feet have a blister magnet built-in, determined to keep me suffering.
Blisters are every hiker's worst nightmare - It wasn't until I started thru-hiking, walking the Colorado Trail, the rugged Arizona Trail, and a 6-month journey on the Pacific Crest Trail, that I finally cracked the code to beating them at their own game. As the queen of all blisters, I have honed my skills in the art of blister treatment which took me a decade of suffering and experimenting.

Blister Hot-spot
One of the most effective ways to deal with blisters is to prevent blisters before they even develop. Here are some tips to consider.
Proper Footwear
It is essential to invest in well-fitted hiking boots or shoes that offer ample support and cushioning. Ensure there's sufficient room in the toe box to prevent friction. In the thru-hiking community, many of us have transitioned away from boots. Trail runners have become the hiking footwear of choice.

Changing from old to new trail running shoes
Trail runners are often preferred over traditional hiking boots for their lighter weight and breathable designs, which can reduce the formation of blisters. Their snug yet comfortable fit helps prevent rubbing and irritation, while the quick-drying properties of many trail runners also prove beneficial in wet conditions, reducing the risk of moisture-related blisters. Personally, wearing trail running shoes has significantly aided in preventing blisters for me.
Break-In Your Footwear:
Before hitting the trail for an extended hike, wear your hiking boots or shoes around the house or on shorter walks to break them in and identify any potential friction points. Perhaps one advantage of having trail running shoes is that many do not need breaking-in compared to boots.
Proper Shoe Lacing:
One often overlooked but highly effective way to prevent blisters is through proper shoe-lacing techniques. By adjusting how you lace your shoes, you can minimize friction and pressure points, reducing the likelihood of painful blisters forming
Moisture Management & Proper Sock Selection
Keep your feet dry by wearing moisture-wicking socks and breathable footwear. Avoid cotton socks, as they retain moisture and can increase friction. Change socks if they become damp. For many thru-hikers, Darn Tough socks are a top pick both for comfort and durability.
When trekking through streams, on a wet trail, or even in snow, I started wearing waterproof socks to avoid getting my feet wet while wearing breathable trail running shoes. Dexshell has become my go-to waterproof sock, as they allow my feet to breathe while keeping them dry.

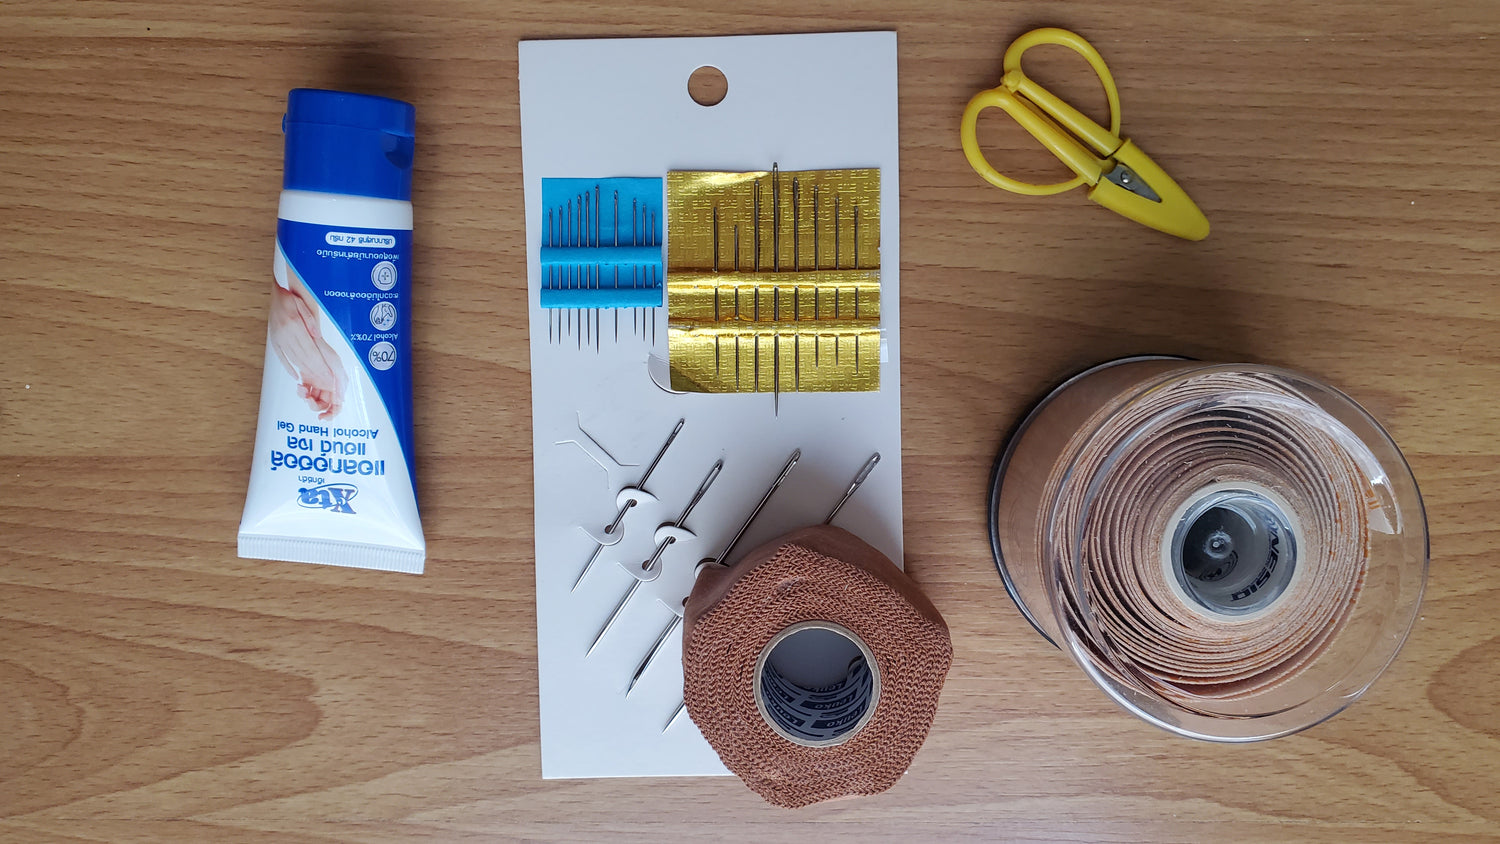
Blister Queen’s simple Blister Kit
Blister Kit
Consider using blister prevention products such as tape, blister pads, ortoe caps to reduce friction on hot spots. Leukotape is my top choice, not just for blister prevention, but also as a handy item for quick gear fixes. In my blister kit, I always have Leukotape, a small pair of scissors, a needle, and alcohol sanitizer on hand. It's all about being prepared for when blisters strike.
Treating Blisters on the Trail
Despite your best efforts to prevent blisters, they can still develop, I have been there. When they do, it's essential to address them promptly to prevent further discomfort and potential infection.
Here's how to treat blisters while trekking:
Stop, Assess, and Evaluate
As soon as you feel discomfort or notice a hot spot on your foot, stop hiking and inspect the affected area. Ignoring the early signs of a blister can lead to more significant problems later on.
Clean & Drain Blisters
If the blister hasn't ruptured, gently clean the surrounding skin with an alcohol wipe or antiseptic solution to reduce the risk of infection.
If the blister is large, painful, or likely to rupture on its own, you may need to drain it. To do this, sterilize a needle or pin by heating it with a flame or wiping it with alcohol. Then, puncture the blister near its edge and gently press out the fluid. Avoid removing the overlying skin, as it acts as a natural barrier against infection.
While some may have differing opinions about this, based on my years of personal experience with blisters, I've found that draining them is usually the most effective solution. This method helps prevent them from worsening, promotes faster drying and healing, and can ultimately save your hike. Padding them up or just leaving them in most cases will result in your hike being over.
Protect & Monitor
Once drained, apply an antibiotic ointment to the blister and cover it with an adhesive bandage or moleskin pad.
After your hike, allow the blister to breathe by leaving it uncovered, and continue draining it if there's any remaining fluid. This will allow the blister to dry out quickly. If necessary, apply a fresh adhesive bandage to protect it from friction the following day.
Make sure to check and monitor your blisters for any sign of infection, redness, swelling, or pus. If the blister worsens or becomes infected, it's best to seek medical attention.
Keep your feet happy, one step at a time. No blisters, just bliss-ters!
Leave a comment
This site is protected by hCaptcha and the hCaptcha Privacy Policy and Terms of Service apply.